Requirements and project files
The library requires Python 3.10 or later and NumPy 1.26 or later. The development environment uses uv; parity tests also use PyTorch. The site uses Node.js 22.12 or later and npm. The screenshot capture command requires Node.js 24 and an installed Chrome browser.
Run the commands on this page from a repository checkout. Trained assets are stored in src/glassllm/weights/: pt.npz, en.npz and their two *.tokenizer.json files. load_pretrained requires these files; it does not create random weights to replace missing assets.
Prepare the engine and test the CLI
From the checkout root:
uv sync
uv run glassllm --lang pt tokenize "Capitu olhou para"
uv run glassllm --lang pt generate "Capitu olhou para" --n 8 --greedy
uv run glassllm --lang en generate "Alice was beginning to" --n 8 --greedy
uv run glassllm steps
uv sync installs the local package and the development group. The first synchronization can download large dependencies because PyTorch is included for tests. The CLI accepts --lang pt or --lang en; without that option, its default is English. steps lists marked operations, while tokenize shows IDs from that language’s vocabulary.
For an environment dedicated to running the library, you can also install the checkout into an existing virtual environment:
python -m pip install -e .The runtime dependency is NumPy. To install the published package instead of the checkout, run python -m pip install glassllm. The pretrained models and tokenizers are included in the distribution.
Open the lab
From the project root, enter site/ and install the versions in the lockfile:
cd site
npm ci
npm run dev -- --host 127.0.0.1 --port 4322
Open http://localhost:4322/glassllm/en/ for the English lab or replace en with pt. Documentation lives at /glassllm/en/docs/ and /glassllm/pt/docs/. The /glassllm/ base is part of site URLs, including development URLs.
The dev script runs prepare:wheel before Astro. Preparation invokes uv build --wheel, copies the wheel to site/public/py/ and site/src/generated/, and tells the client its filename. Therefore, uv must be available even when you are only starting the site.
On the first Generate or Step once click, the worker loads Pyodide 0.29.3, installs NumPy and micropip, and installs the local wheel. Wait for the preparation state to finish. Once loaded, prompt calculations run in the browser; the model does not require an inference API.
Check the build and serve the static output
Inside site/:
npm run check
npm run build
npm run preview -- --host 127.0.0.1
check validates Astro and TypeScript. build recreates the wheel and generates static files in site/dist/. preview serves that completed output; use the address and port printed in the terminal and retain the /glassllm/ base. These commands do not publish the project.
When loading fails
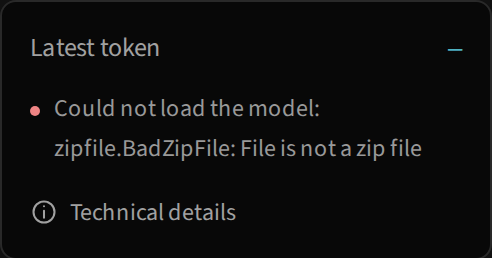
First check the terminal that started Astro: a failure in uv build prevents wheel preparation. If the interface opens but the model fails, expand Technical details and check access to the Pyodide CDN and the wheel served from the site’s own origin.
Do not rename a wheel to glassllm or an arbitrary filename: micropip validates names structured like glassllm-0.1.0-py3-none-any.whl. After correcting the assets, try Step once again or reload the page. See states and troubleshooting to distinguish download, installation and model-data problems.